What does Faux really mean to a sewing enthusiast?

To get started I picked up some nice quilt shop quality pieces and then ordered some online pieces to compare. Yes, there were differences....what did I see:
- Online cork specifically states it can NOT be washed and should be used for dry applications
- Online cork comes in a wide range of "finishes" with colors and metallic embellishments; though you may have to buy a big pack of finishes you don't want, just to get the one sheet you do want
- Online cork backing fabric is a looser weave giving the piece less structure
- Online cork can be seen through when held up to the light
- Online faux leather had a nice texture and great selection of colors; quilt shop colors were a bit more limited
- Online faux leather was significantly thinner and required stabilization to keep shape
The thinner pieces from the online purchases still looked nice, but to use them I found I had to back them to make them stable enough to use in a project without fear of falling apart. I am still concerned about the online cork since it says that it can't be washed, I spritzed it with some water to make sure the glue holding the pieces to the fabric backing did not fall out, and so far so good - though I have to admit that I had already glued a backing fabric to the back of the cork before testing with water. When I fold the online cork it feels like the pieces are going to pull away from the backing, they haven't so maybe it will work out. I'll have to update you after I have played with it longer.
I mixed and matched some of the cork finishes in my project and it did add a nice appeal to final project. I didn't think I would like the cork with the colors sprinkled in it, but they added a nice attractive look when combined with a cotton lining fabric that helped to bring out the highlights in the cork. My preference on the leather was still towards the more muted tones, I felt the heavily colored online faux leathers just looked a bit too faux for my taste, but you might find them appealing.
The advantages of the cork and faux leather are the easy of use and the prices as compared to real leather. Though expensive compared to a cotton fabric, you don't usually need a large piece and it is sold in small sheets so you can get just what you need to make your project without breaking the bank. The embroidery machine handles these fabrics wonderfully and the results look amazing. You can use them for small projects or add them to a larger project for that high end look. It is worth giving them a try. If you decide to start cheap with some online purchases, keep in mind that if you have issues with them, just try the thicker/nicer stuff from your local quilt/sew shop and you may find that for just a tad more money you get the quality results you are after.
Cork Wallet Pattern
- cork fabric (1) 4" x 10 1/2", (2) 2 1/2" x 3", (2) 1" x 2 1/2"
- Fabric (rip stop works well) 4" x 10 1/2"
- Glue (steam-a-seam, spray glue, fabric safe flexible Alene's glue)
- Thread, contrasting color looks nice
Optional: Fray Check (or other seam sealant)
Directions:
1) Glue/fuse the fabric to the back of the 4" x 10 1/2" cork. Test your iron on your cork, too much heat will cause it to roll, too much steam can cause the glue that holds the cork to the backing fabric to let go. Use a permanent adhesive.
2) Fold the 1" binding strips in half and place them along the 2 1/2" top edge of the two 2 1/2" x 3" cork pieces.
3) Top stitch binding pieces in place along the bottom edge of the binding strip, back tack both ends to complete the credit card sleeves..
4) Place the credit card sleeves on opposite ends of the main wallet. Place the sleeves right side up on the right side of the main wallet I recommend Wonder Clips to hold the pieces in place for sewing.
5) Starting at the top edge of the wallet sew down the short edge, pivot at the bottom and continue to sew following the edge of the credit card sleeve. I reinforced the stitching at the top edges of the sleeve with back-tacks to increase durability. Repeat on the other end for the second sleeve.
6) Fold in the end of the wallet along the outside edge of the sleeve (not the stitch line but the edge of the sleeve fabric). Repeat for both ends. There should be about a 1/2" gap in the middle where the backing fabric is visible.
7) Sew along the top edge of the wallet, add a back-tack in the middle to reinforce the edges where the bills go, and repeat for the bottom edge. Where there are already stitch lines from sewing on the sleeves, try to stay on the same line for a cleaner finish.
8) Fold your wallet in the middle and trim any excess cork from the sleeves that may be visible when the wallet is folded. If necessary (depending on the quality of your cork and choice of lining) add a bead of seam sealant (like Fray Check) to the raw edges of the project.
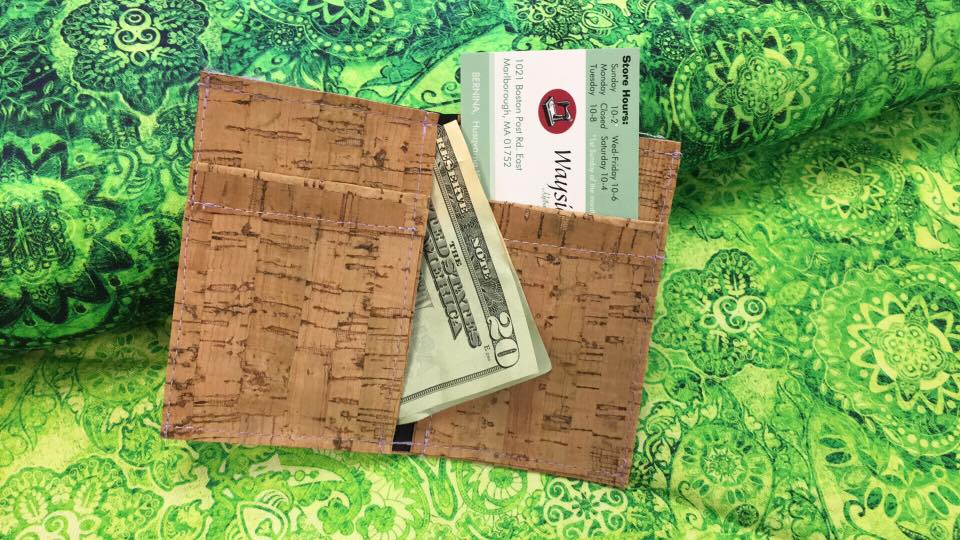
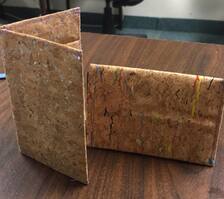
My sample is on the left, the ones one the right were may by some of our summer campers. This is design for the bills to be folded in half and inserted on either side of the wallet. The money pockets are about 1/4" shorter than the folded bill so the bill sticks out just enough for you to pull it out without having to manhandle the wallet to get at the bills. The credit card sleeves are wide enough for a few credit cards to be placed on each side. You can use any extra backing fabric to make a small change purse to slide in one of the bill pockets if you want to keep change in your wallet.
Hope you have fun making these. They are quick and easy. I used stitch witchery to hold in my lining of rip stop since it had such a low melting point; this way I didn't ruin the rip stop with too much heat.
Jill


 RSS Feed